Today we bring you a guide to install the lighting in our Draco V2, Krater and Vega towers. If you have any of these models we hope that these small clips that we are going to show and explain below will help you to solve any of your doubts.
Many of you are facing for the first time the complex task of assembling your equipment and to make things easier we have made three small assembly guides on how to properly install each of the cables for the controller that is installed as standard to perform its function.
Nfortec Krater RGB
Let's start with the towerNfortec Kraterwe are going to start with the tower, a tower that you have liked a lot and that most of you enjoy its RGB in your home. The first step (obvious) is to open its side panel where all the cables go and remove the bag with the screws and the remote control.
Once we have located the cables, in this case the ones that come out of the front button panel and control the actions of the LED button and the lighting strip on the front are already connected, so we skip this step and go to the connectors that interest us. In this case the one that is obligatory for it to work is the SATA that we will have to connect to the one that we will have to leave from the power supply.
With this we will enjoy the lighting and all its effects, the other cable that we find without connecting is optional and is the PWM connector that controls the revolutions at which the fans work depending on the temperature at which the tower is.
Nfortec Vega
Now let's move on to the mini tower guide Nfortec Vega. In this case the installation is a little different, the first step is again the same, remove the side panel where the cables are located (surprise). In this case we will see that the controller also comes standard with the rear fan connected to it but not the other two and this is because the front ones do not have lighting so the connectors are different.
We look for the two MOLEX connectors that start from each of the front fans and connect them together, once this step is done we must connect this MOLEX to one of those that we will have in the power supply.
Then we look for the MOLEX cable that comes from the controller and connect them to the other MOLEX connector that we have in our power supply and we would already have the complete installation since these fans do not have PWM control so we would not have to connect any more cables. The cables that control the front lighting and the one that allows us to switch between the effects from the LED button are already connected as standard.
Nfortec Draco V2
Finally we bring you the assembly guide of the tower Nfortec Draco V2, using in this case the White Edition, a tower that is a real beast and that you love because it lasts a short time in our stores.
The first step, you are not going to see it coming, is to remove its back plate where we will find the cables. In Draco V2 there is a peculiarity and it is that the controller is not installed in any previous place, being able to place it where better it comes to us to facilitate the assembly.
Once we extract the bag with the controller we look for the cable that starts inside the LED button and connect it to the port where it says LEDSW on the controller.
Then we look for the four connectors of the fans, the three front and rear and connect them consecutively in the ports marked as FAN1 to FAN4. This is very important, it is necessary to connect them consecutively without leaving any gap in between for the correct operation of the fans.
After this step we only have to connect the MOLEX that comes from the controller to our power supply, to the other MOLEX connector. Once these steps are done we can enjoy the lighting of the tower Nfortec Draco V2 in all its splendor.
Many of you ask for our RGB controller, its main function is to synchronize the ARGB lighting of our different components of Nfortec so most of the controllers or RGB technologies of the towers are not compatible as they are different technologies.
So far this installation guide through the controller. We hope it has helped you and solved any doubts you may have on this subject.
Krater ARGB Black Gaming Tower Performance and aesthetics come together in the new chassis Nfortec Krater ARGB, creating a tower that highlights its ventilation system with its mesh front and in turn a spectacular design that catches you from the first moment. *Units purchased from July 2020 carry fans and controller upgraded to 5v 3pin A-RGB connector,...
Save products on your wishlist to buy them later or share with your friends.
Use your Amazon Account
With Amazon Pay and Login with Amazon, you can easily sign-in and use the shipping and payment information stored in your Amazon Account to place an order on this shop.
 English
  Español
 Italian
 Português PT
 Français
 Deutsch
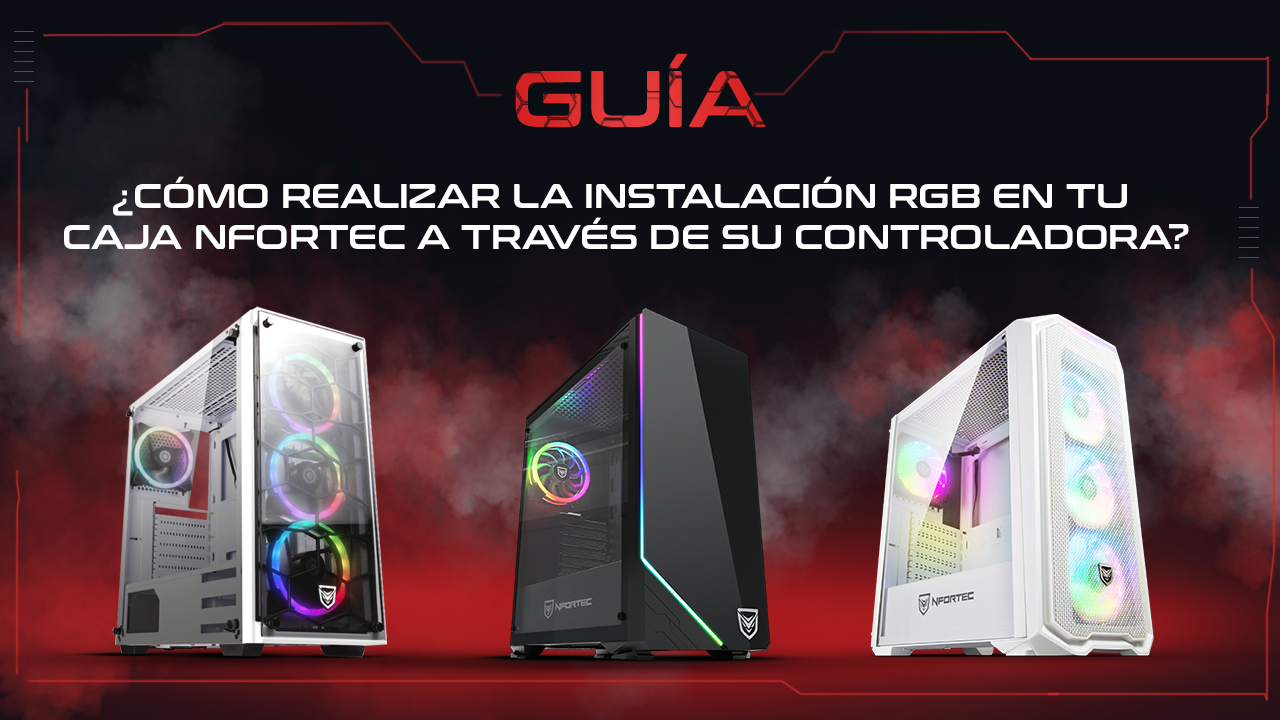


Comments (0)