For this year you have set yourself the clear purpose of building a gaming PC on your own. However, when you got down to work you discovered that it was not as easy as it seemed. At Nfortec we want to help you make this process easier for you and not end up abandoning in your drawer that tower or that liquid cooler that you had bought with so much enthusiasm and that you were so eager to see working. If you want to know how to connect your cooling to the motherboard and where to place each component in your gaming case read on. How to assemble a gaming PC step by step will be easy if you join us. And you... do you want to set up your next computer?
First steps to build your gaming PC
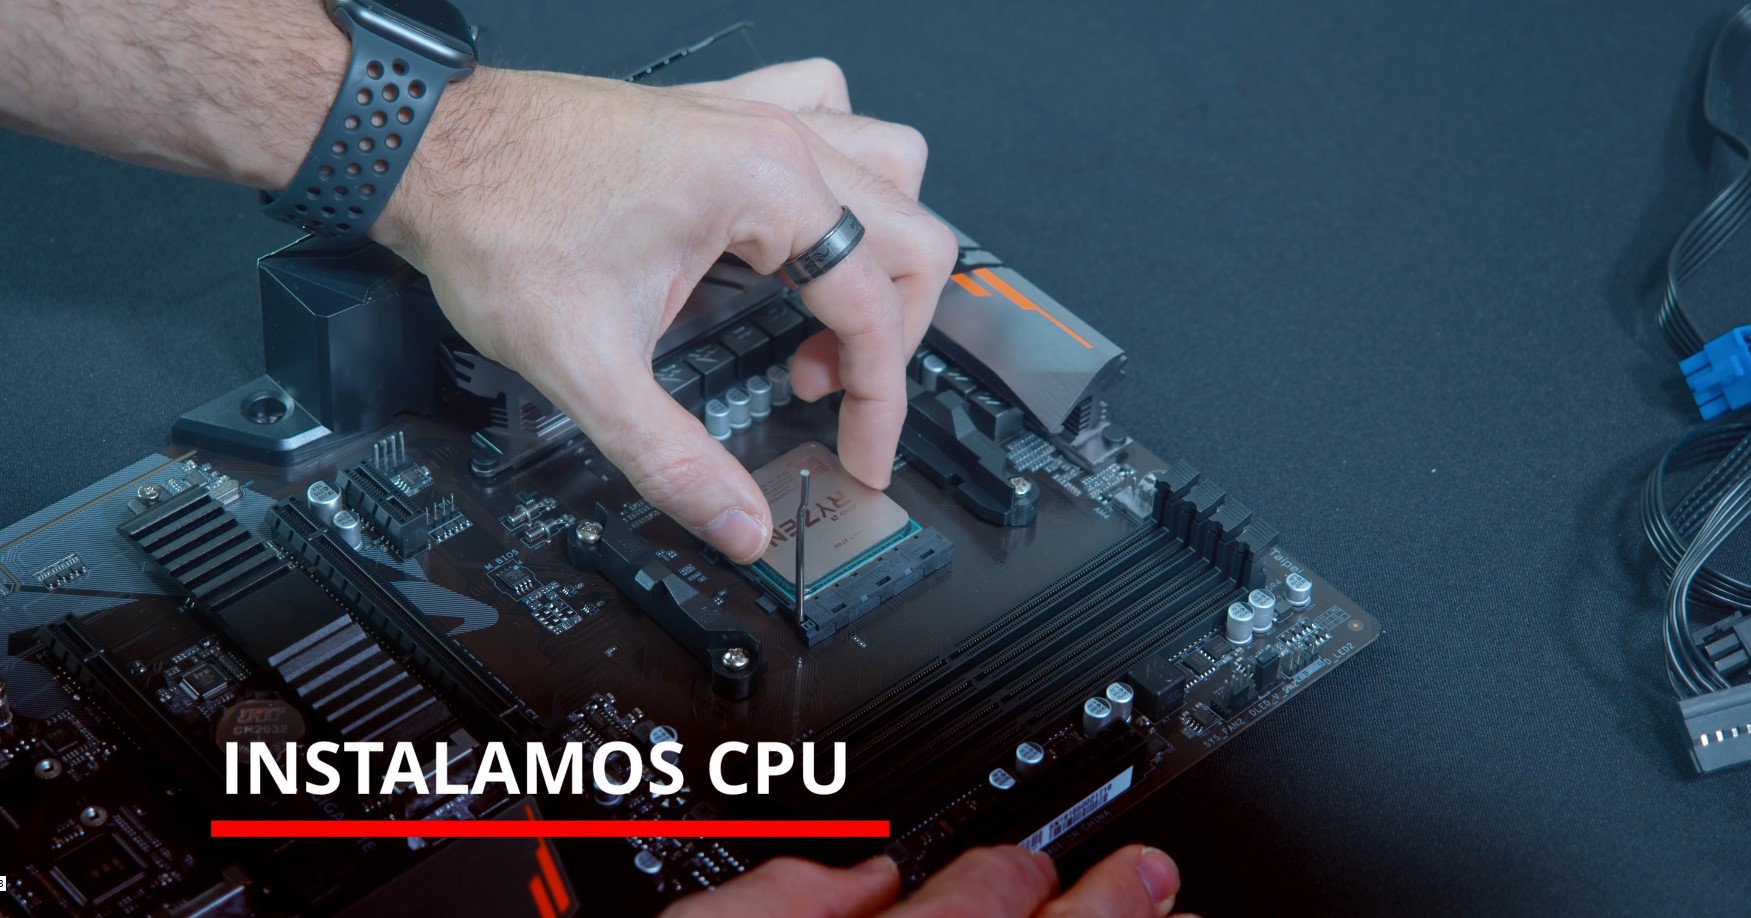
The first step to build a gaming PC is to install the CPU. We will put thermal paste on top so as not to overflow the processor. In the place where we have inserted the paste we will put the cooling pump. We position it in an optimal way and screw it to fix it
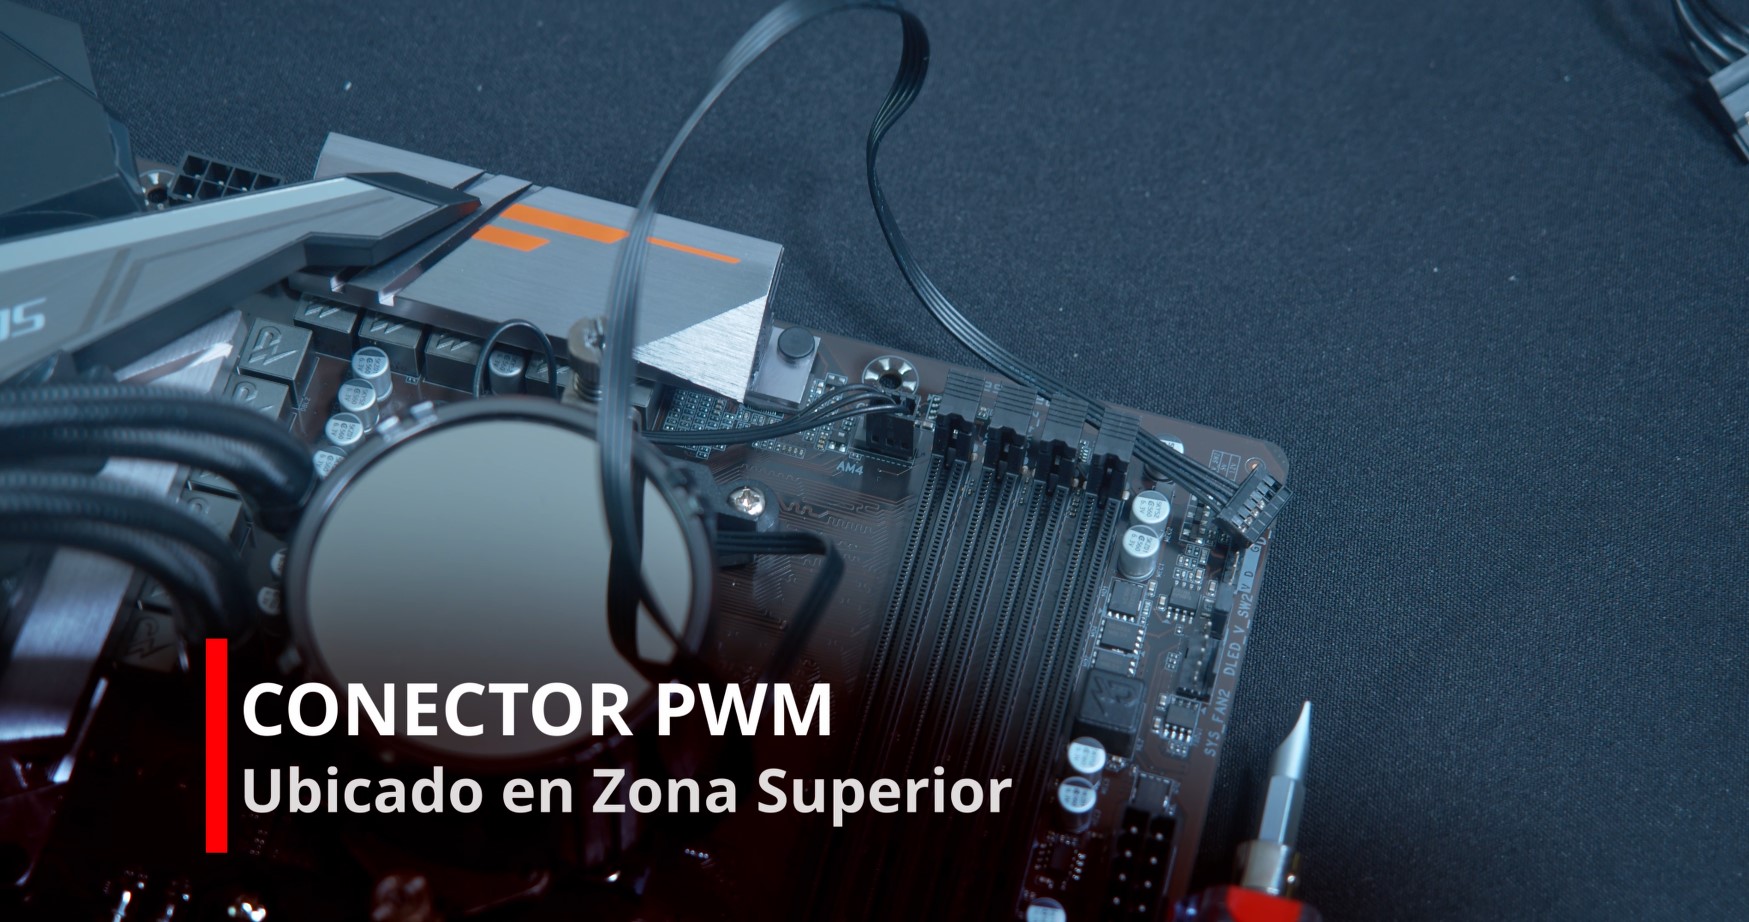
The PWM connector located in the upper area of the pump we will place it in the following position:
Where to place the fans, RAM and liquid cooling
In the next step we will have to use the Oberon fans. To place them correctly, we will first screw the corners
Then we install the RAM and leave a separation slot (leaving it or not will depend on the motherboard in question used to assemble the equipment). The next operation we will have to perform will be the installation of the motherboard, being very careful to check the correct screws to be used
If our case is a Krater and the RAM is very large, preventing the correct installation of the 240 mm liquid cooling on the front, we will apply the process that we will explain below.
In case of having dimensions that do not hinder the installation of a cooling such as Hydrus RGB 240 on the front, we will skip this process
First we unscrew the central fan and the top fan on the front
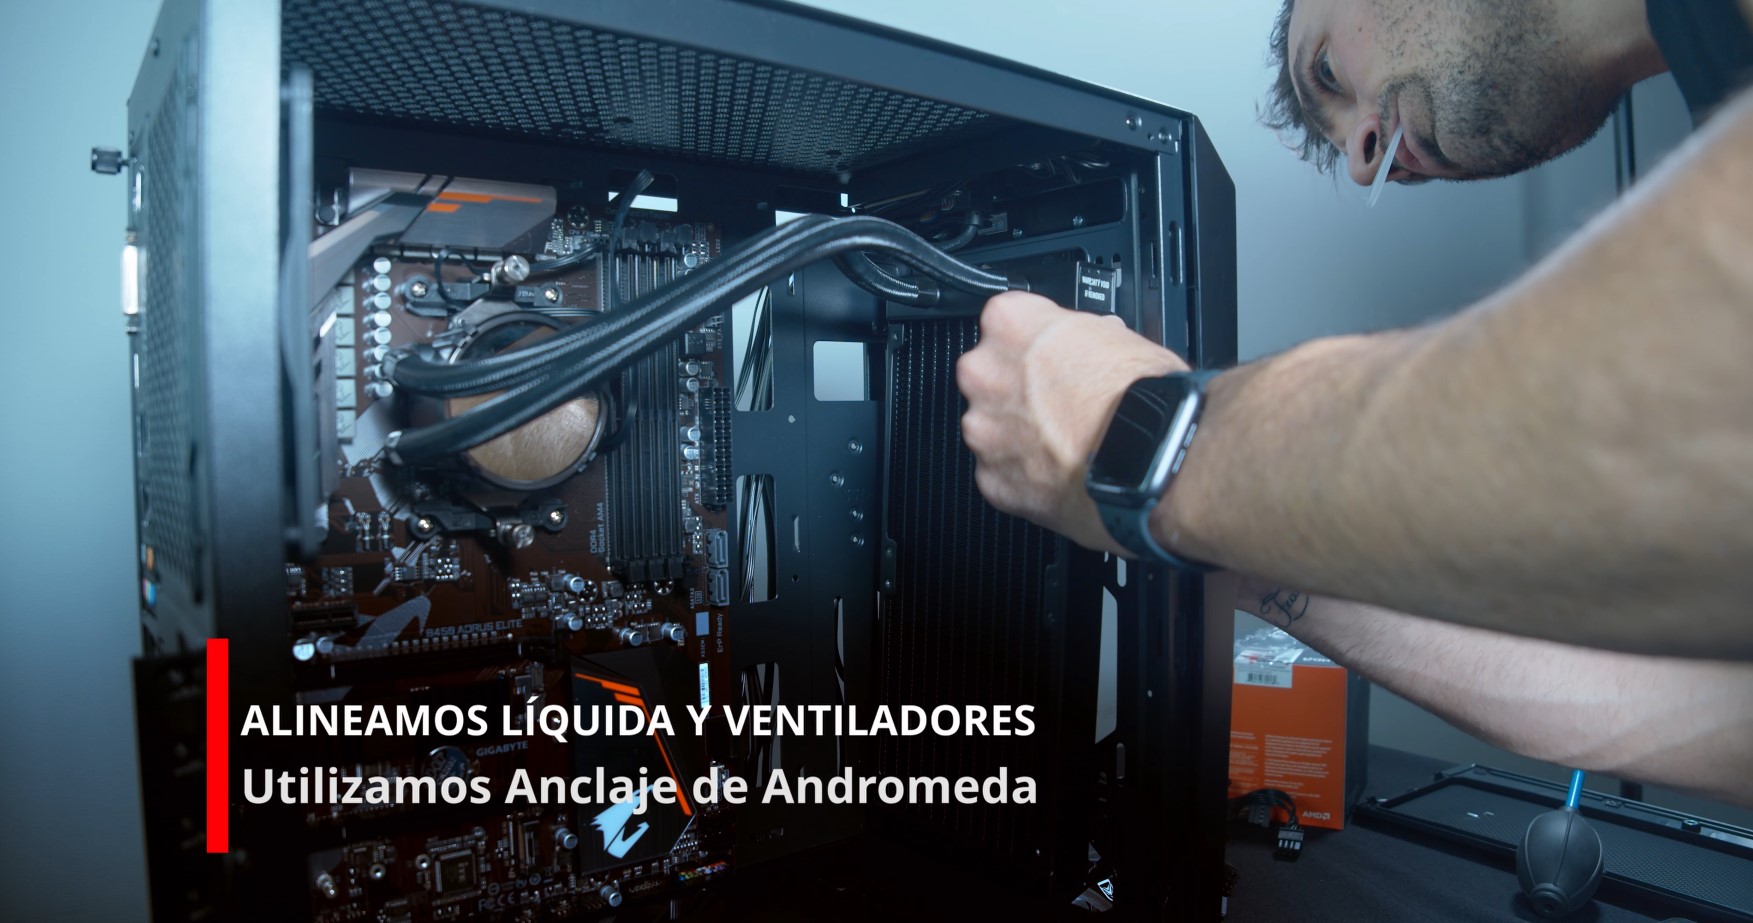
Then we align the liquid cooling and the fans and use the anchor of the cooling itself.
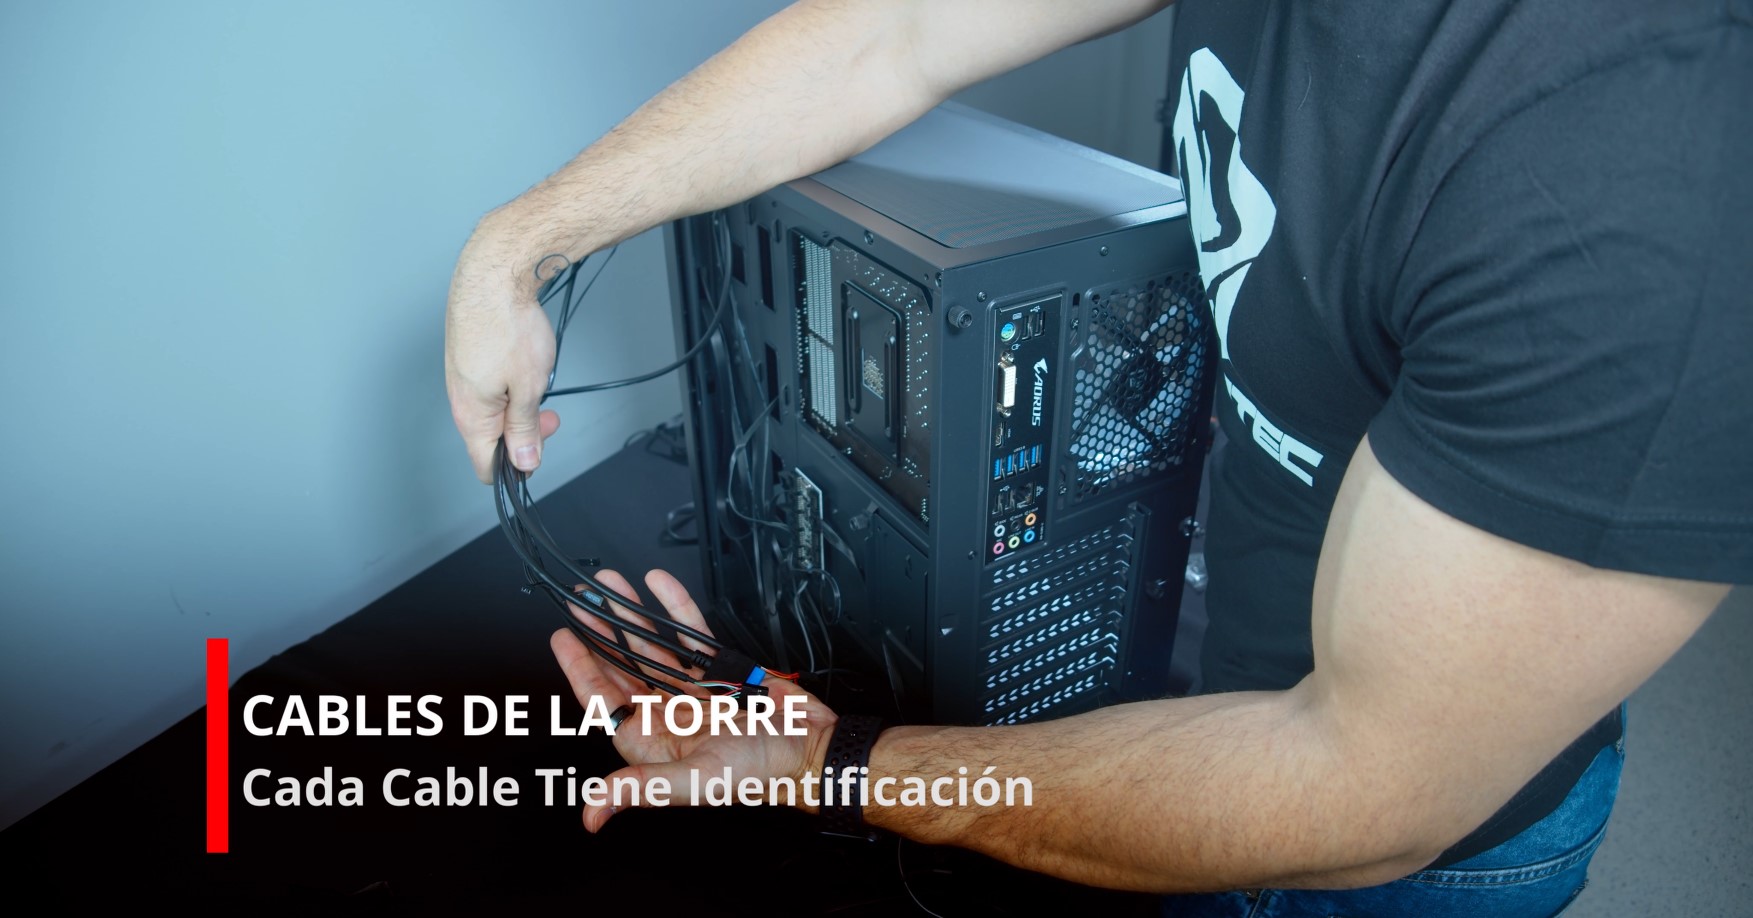
Get to know each cable and discover its functionality and connections
It is important to know that the cables of the gaming tower are perfectly marked and that each cable is marked with an individual identification to know which cable it is and what it is for.
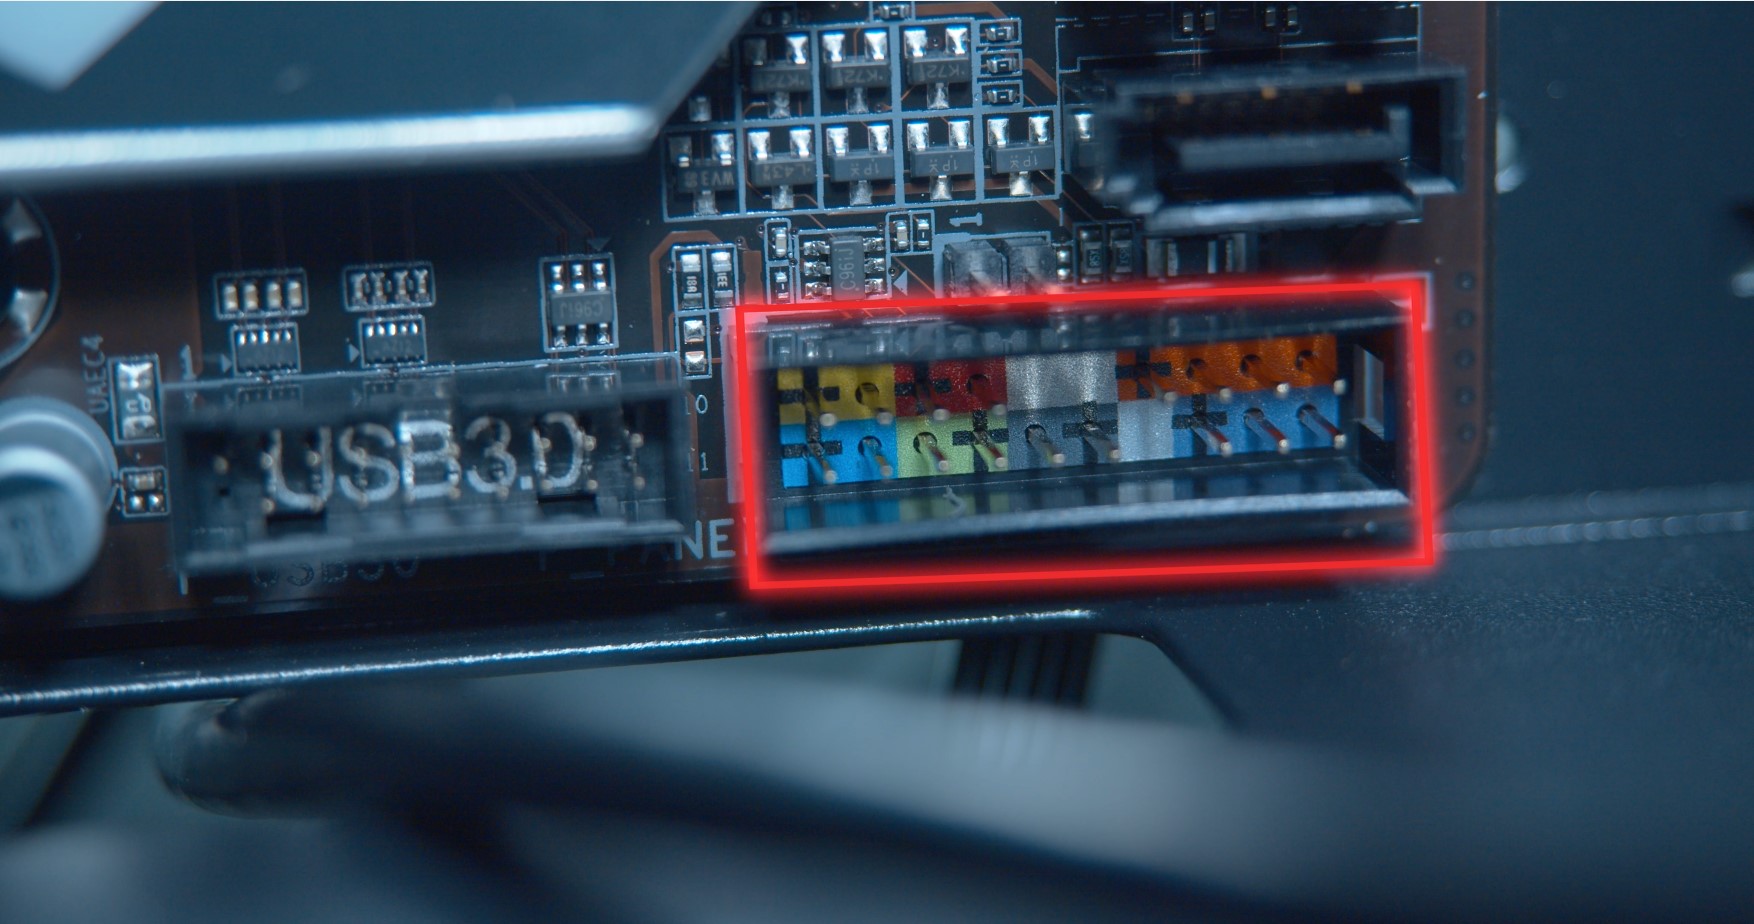
In the lower area of the motherboard there are some acronyms in each port, so when we want to connect a cable we will have to look for those acronyms in the tower cable and check that they match those of the port in which we will have to insert it. The following cables are included:
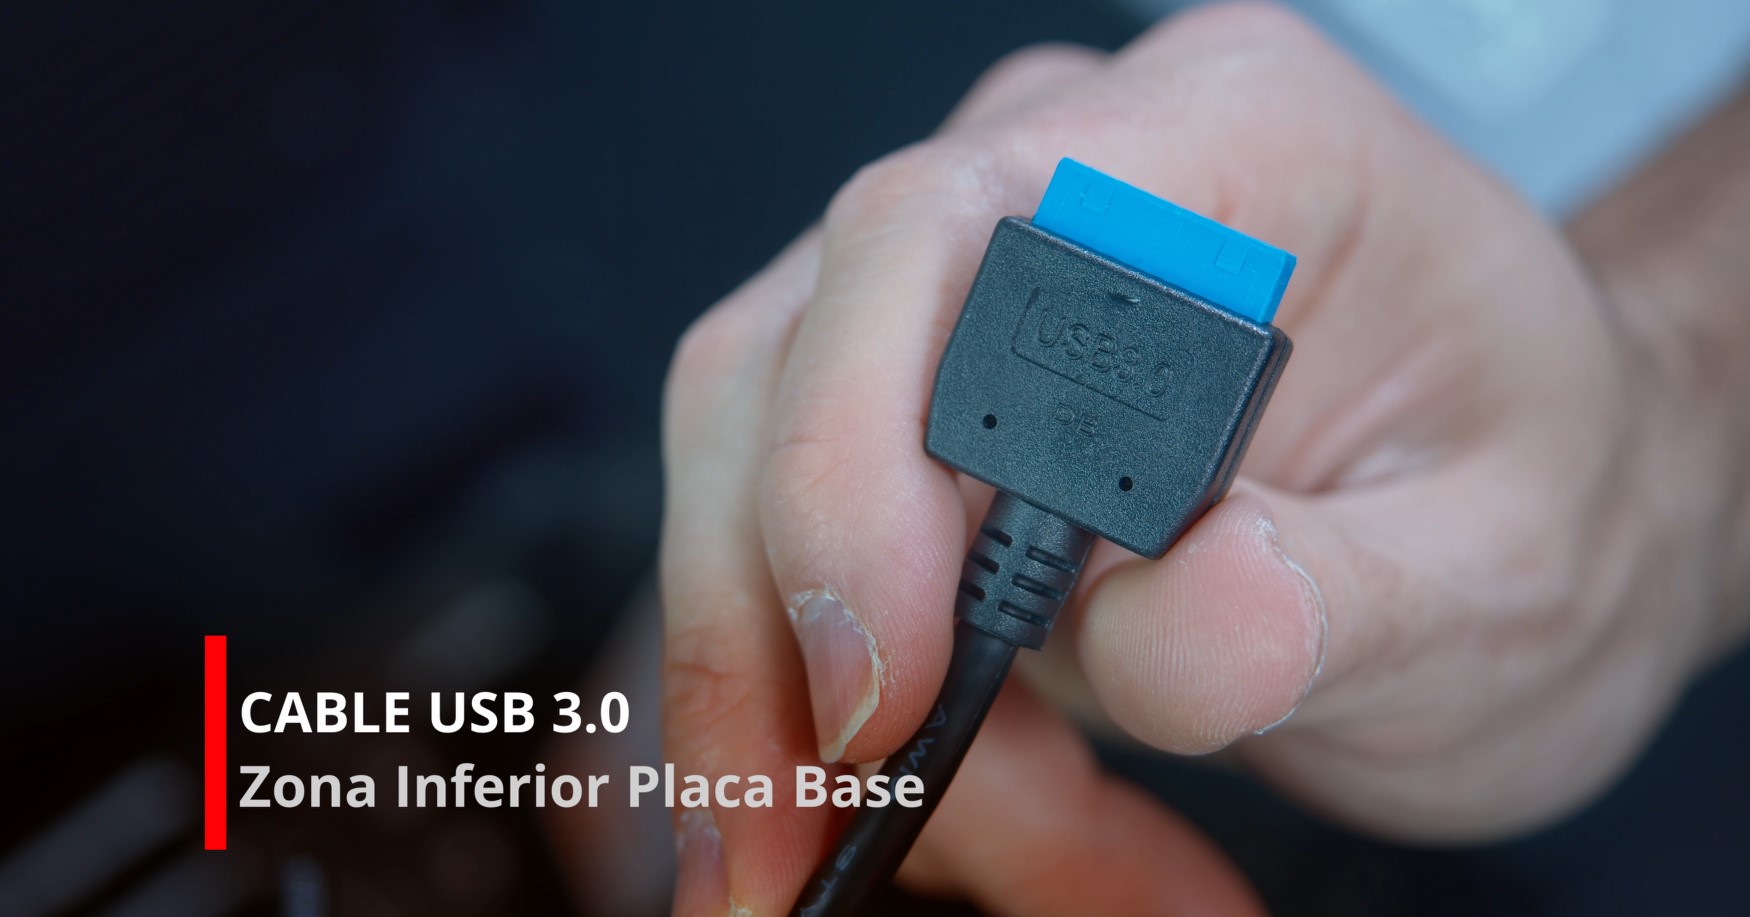
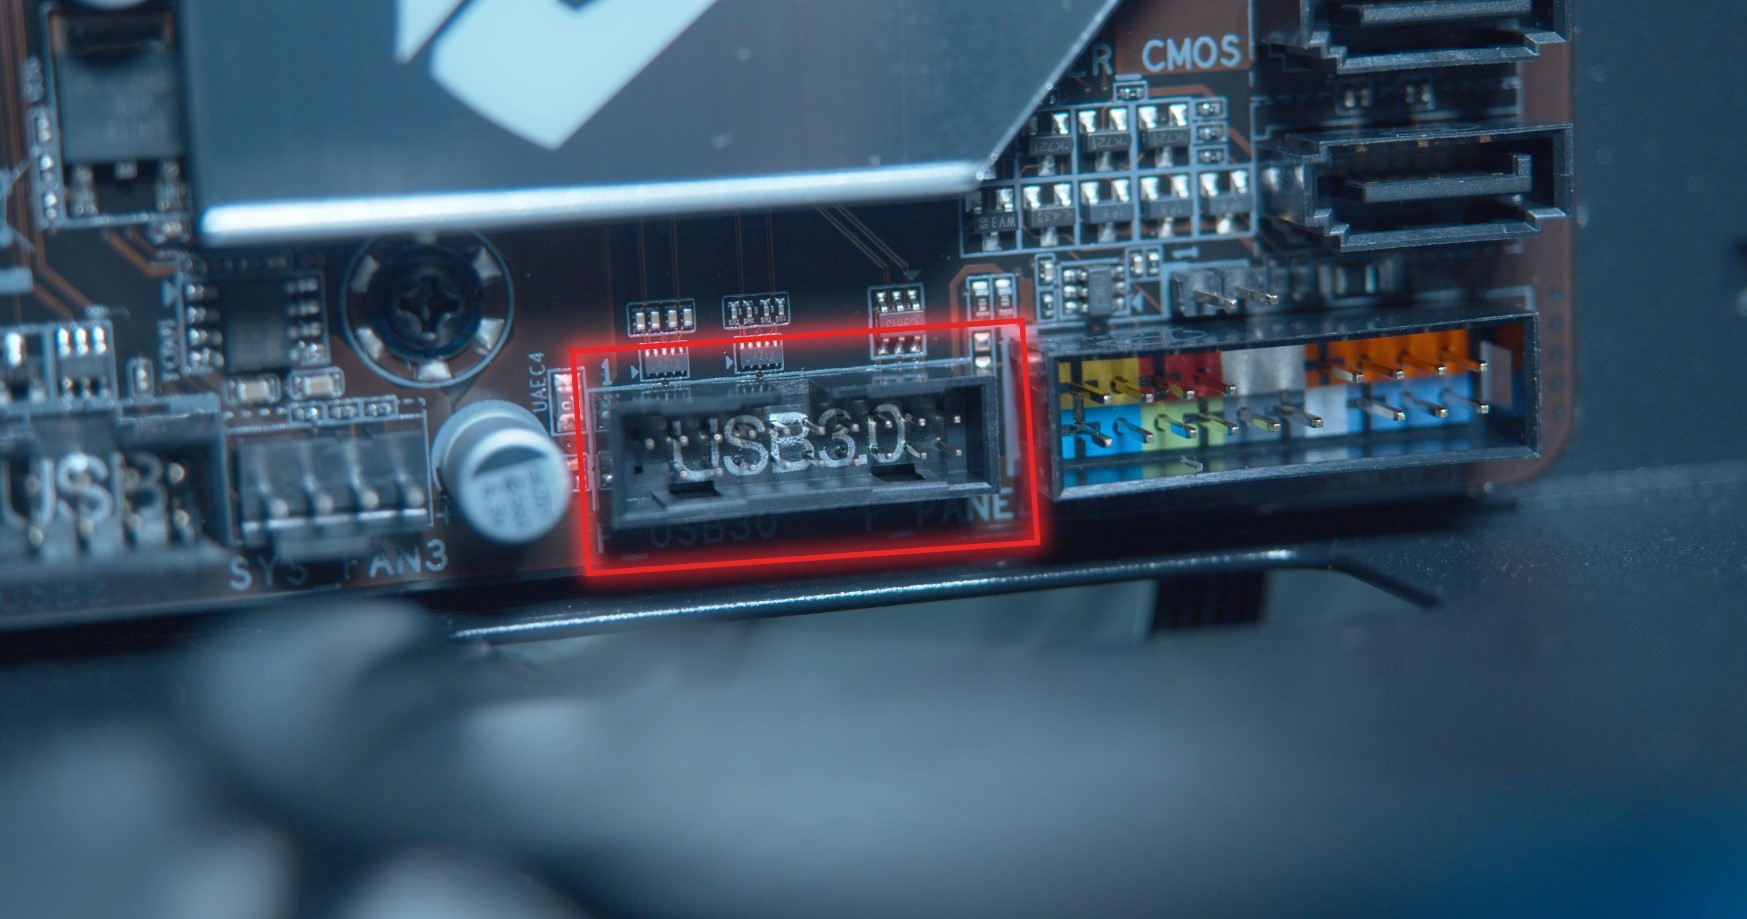
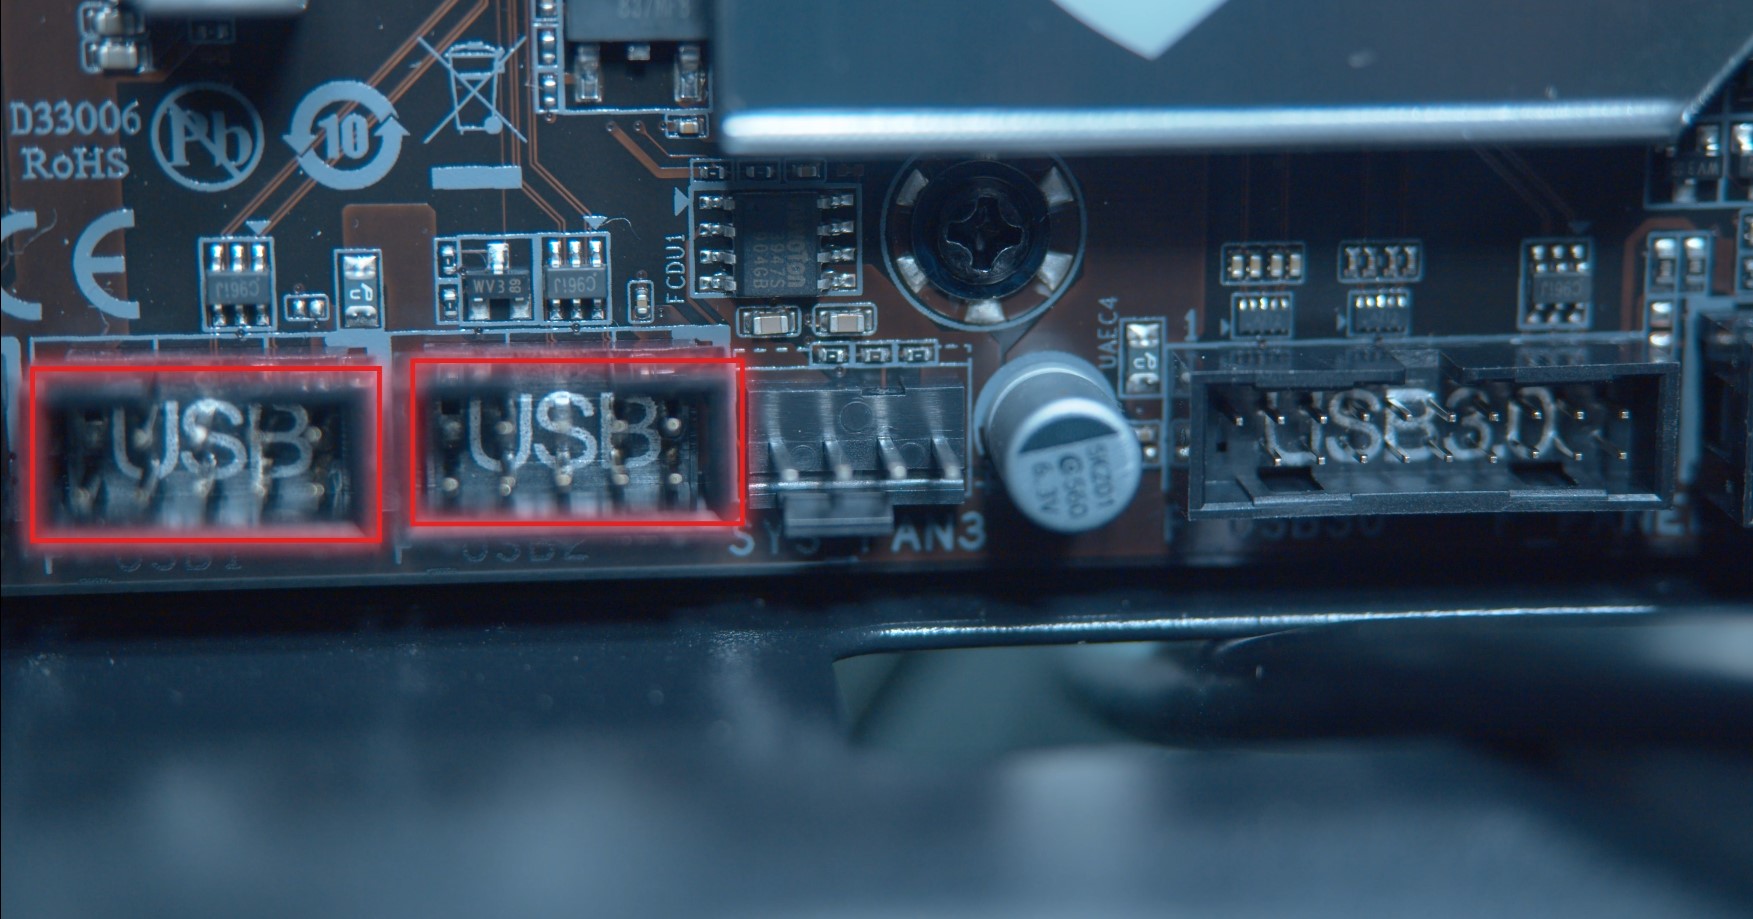
USB 3.0 cable, which plugs into the following port:
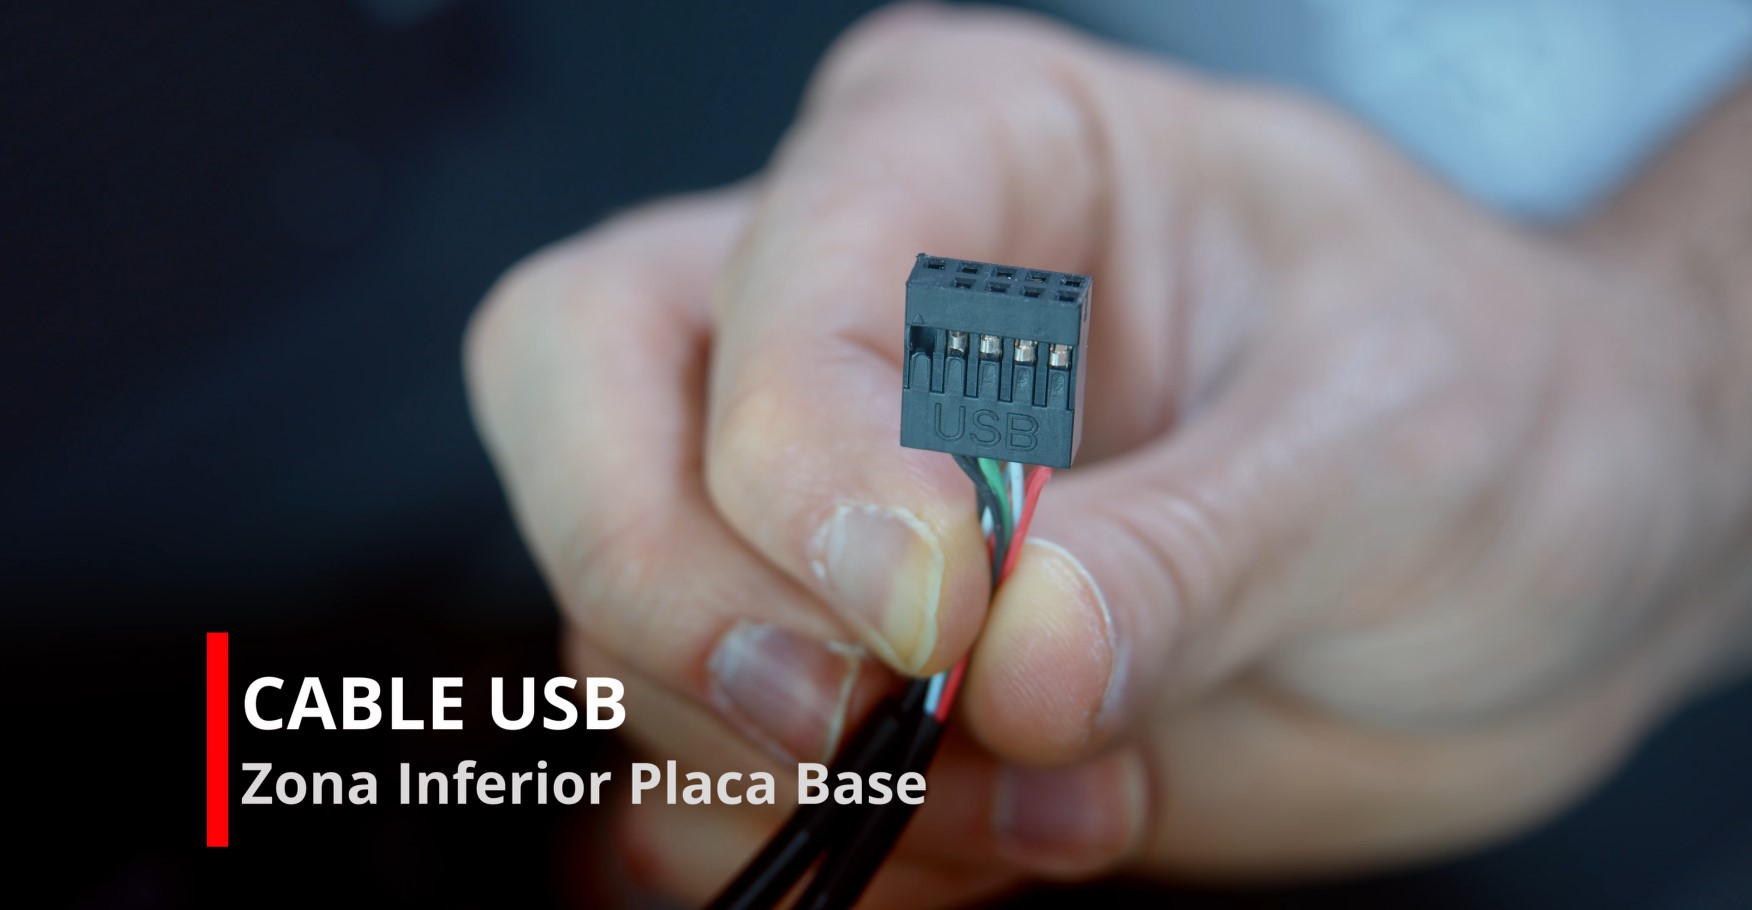
UBS cable, to be plugged in where indicated in the following image:
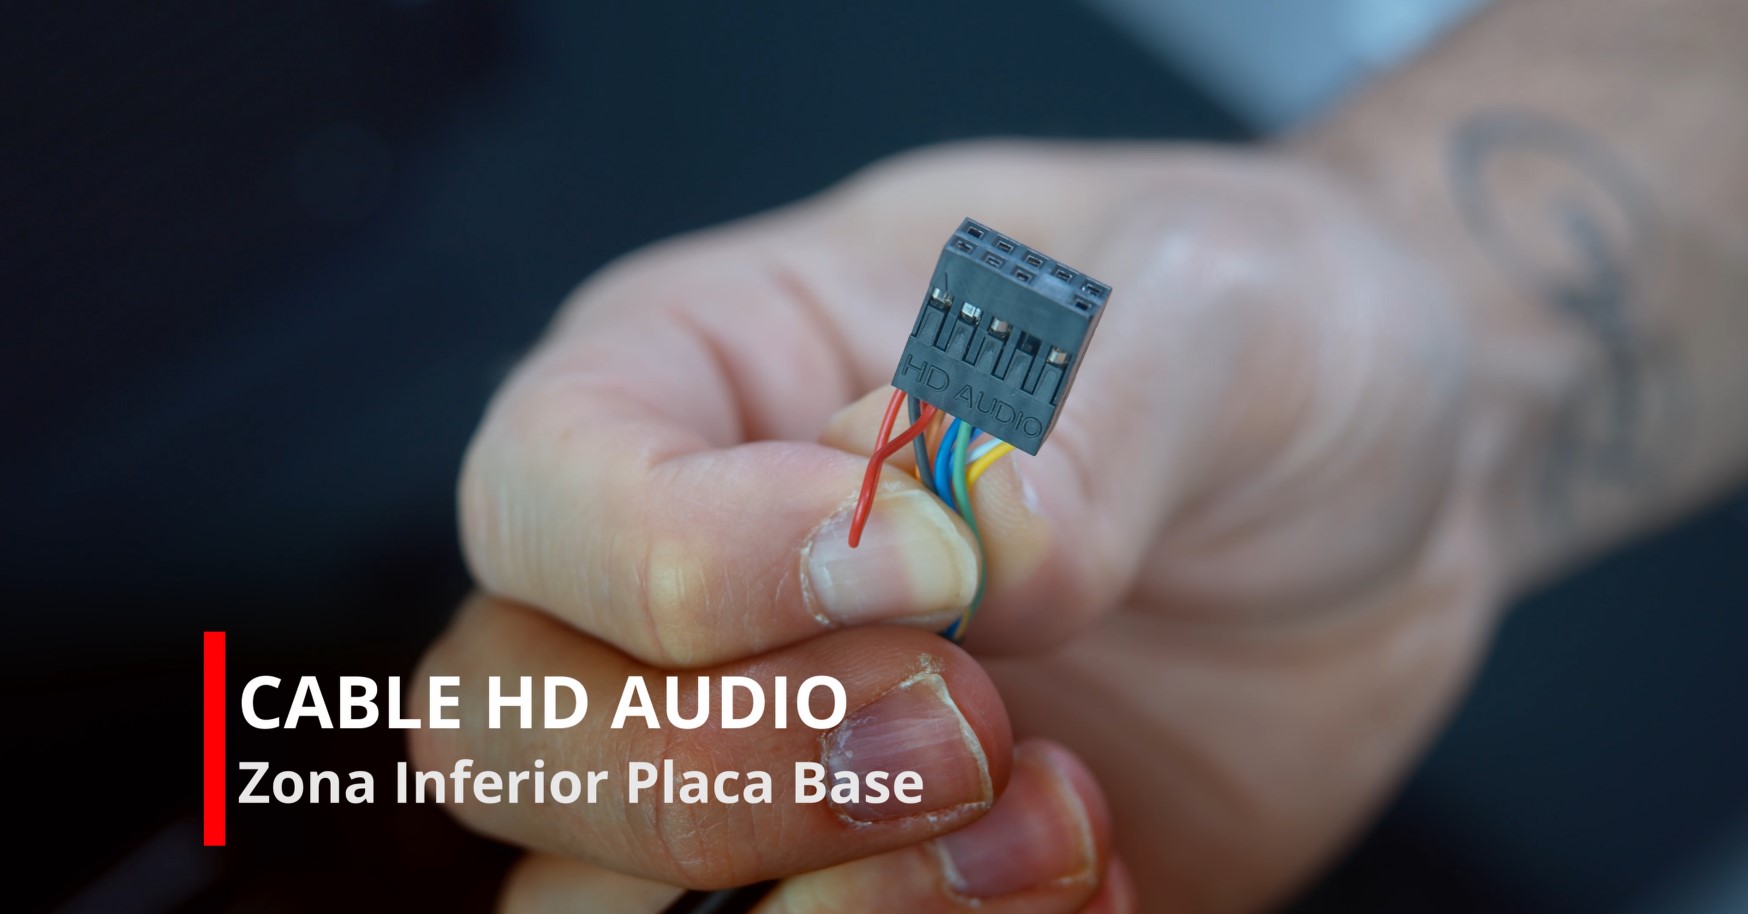
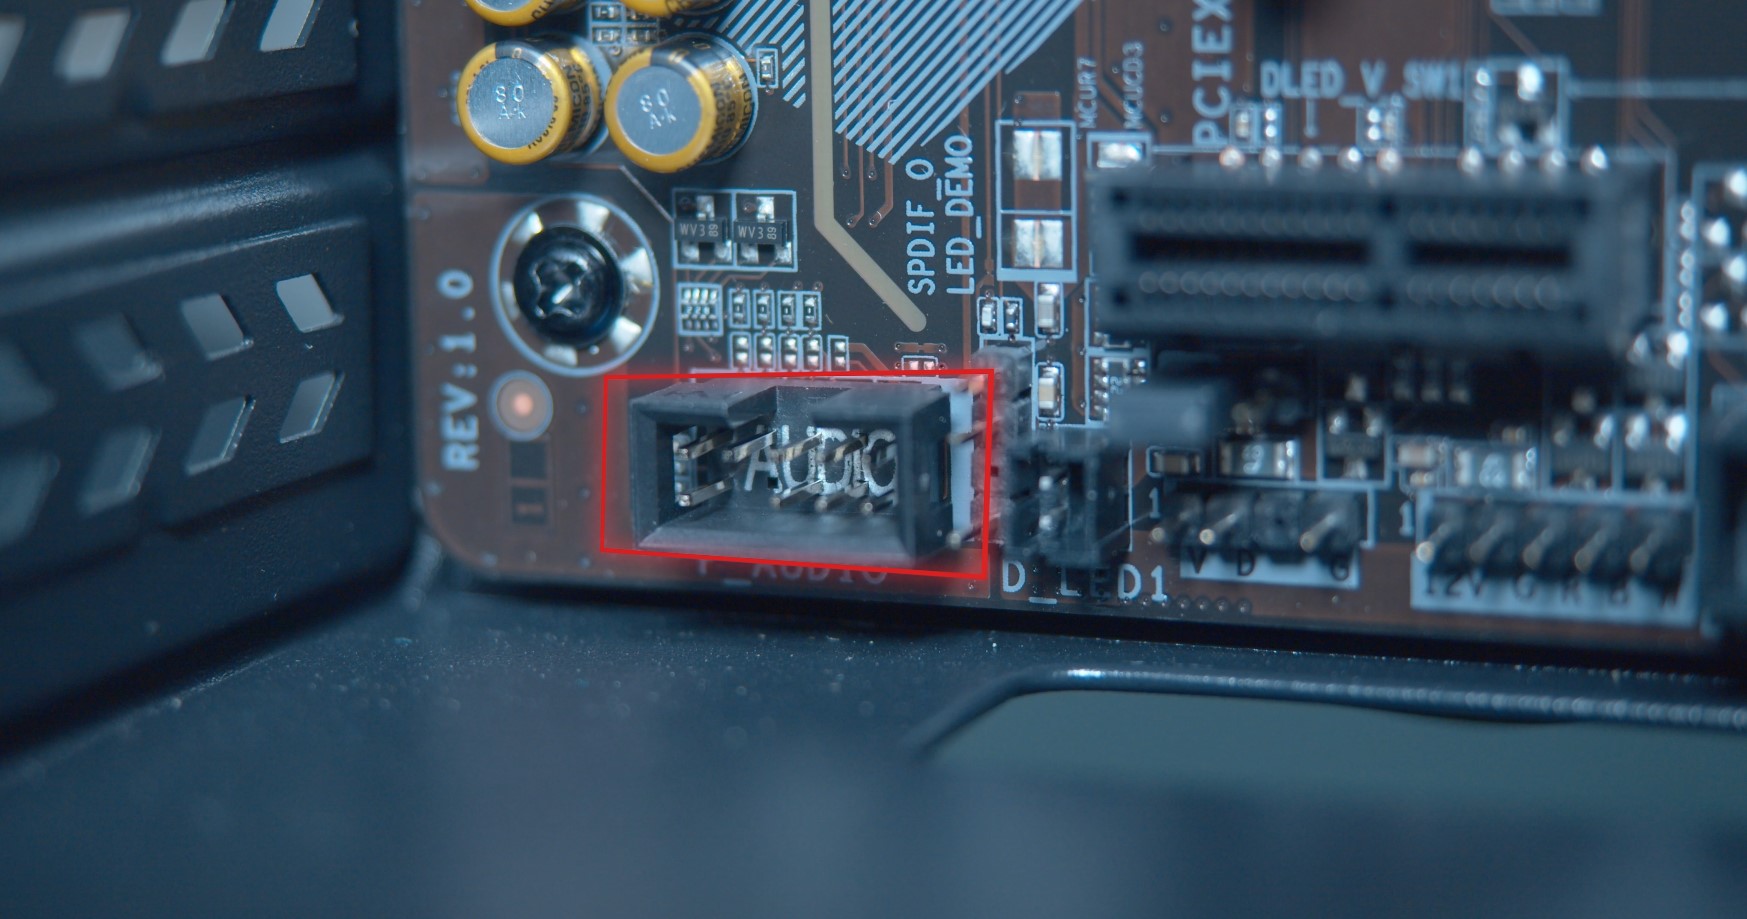
HD Audio cable, to be placed in the following position:
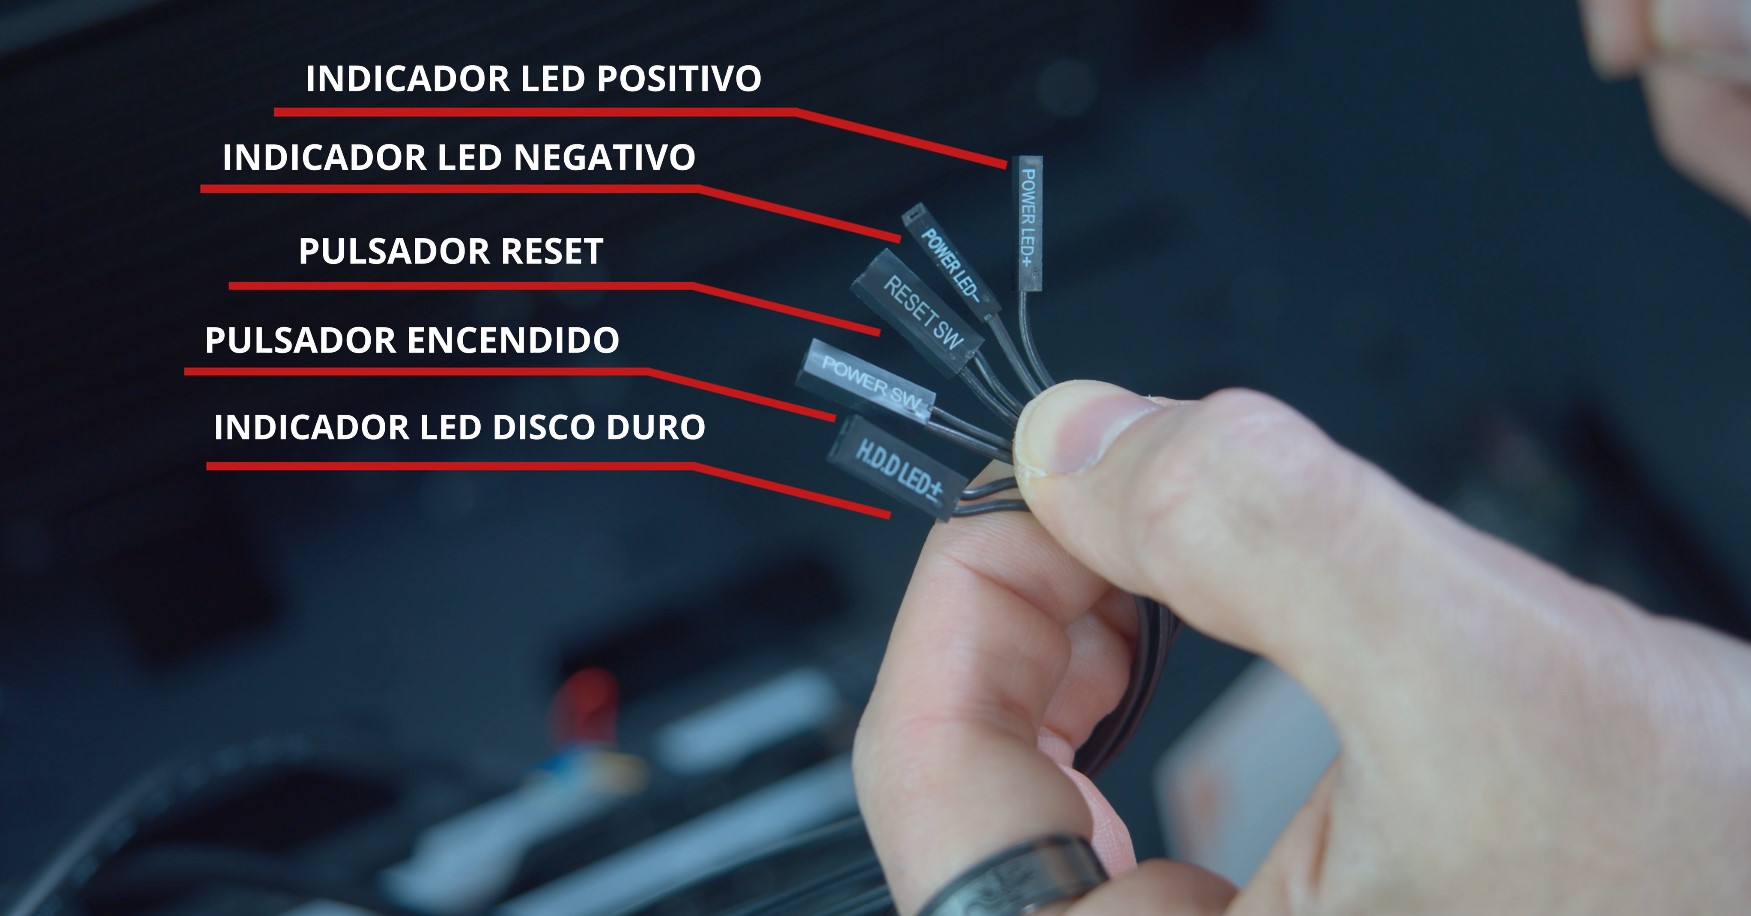
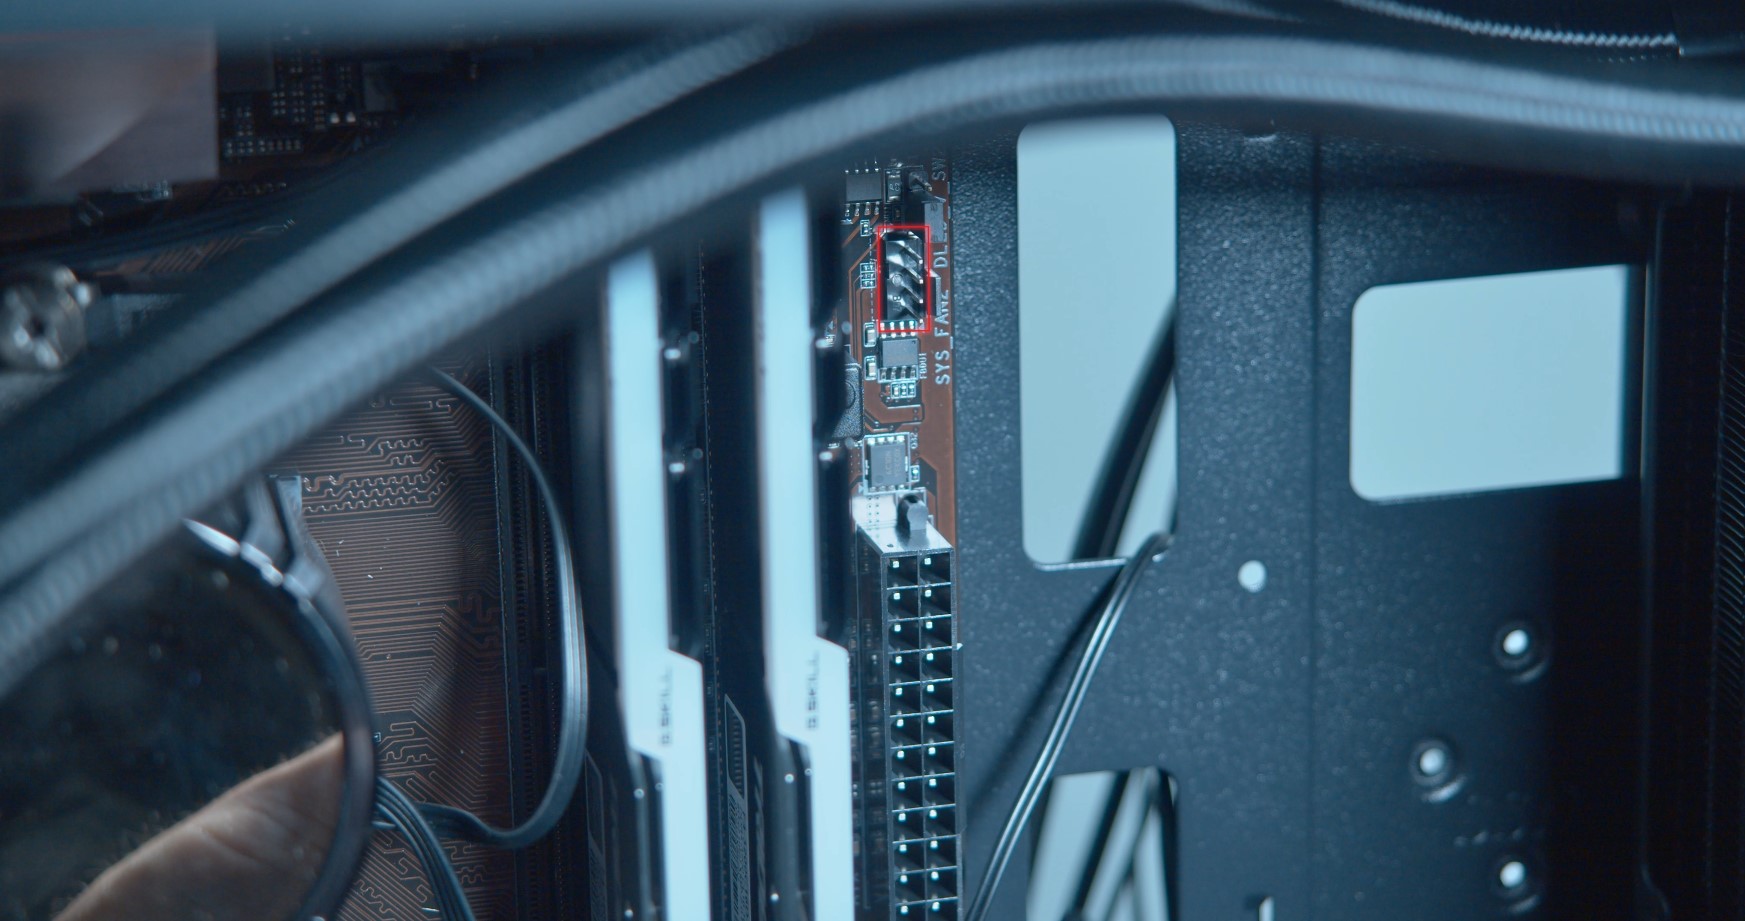
The rest of the cables are as follows:
And their place on the motherboard is:
A for the controller and the power supply
The Krater controller is in charge of regulating the ventilation.
And it is connected in the following position:
The next process that we will have to perform when assembling a gaming pc is the installation of the power supply. We introduce it in the lower part and screw it correctly. We locate the 24-pin connector and connect it to the power supply itself. The 8-pin connector will give extra power to the CPU. The place for the SSD hard disk will be the side compartment, and the HDD hard disk will be inserted in the lower compartment, in a rectangle to be screwed for it. The SATA power cable and the SATA data transfer cable will be connected to the HDD disk. In turn, the SATA data transfer cable will have an output that we will connect to the board
The last steps: graphics card and wiring order
To assemble a gaming PC it will also be necessary to position the graphics card. During this process it will be essential to remove the PCI slots to make room for it and to be able to connect it in its specific slot. The graphics card will be powered by the 8-pin connector.
The liquid cooling connections will start with the 6-pin connector, which will be responsible for providing illumination and the SATA power cable, also connected to the cooling source
One of the last steps to assemble a gaming PC step by step will be to arrange the cables in the distribution compartments provided for this purpose
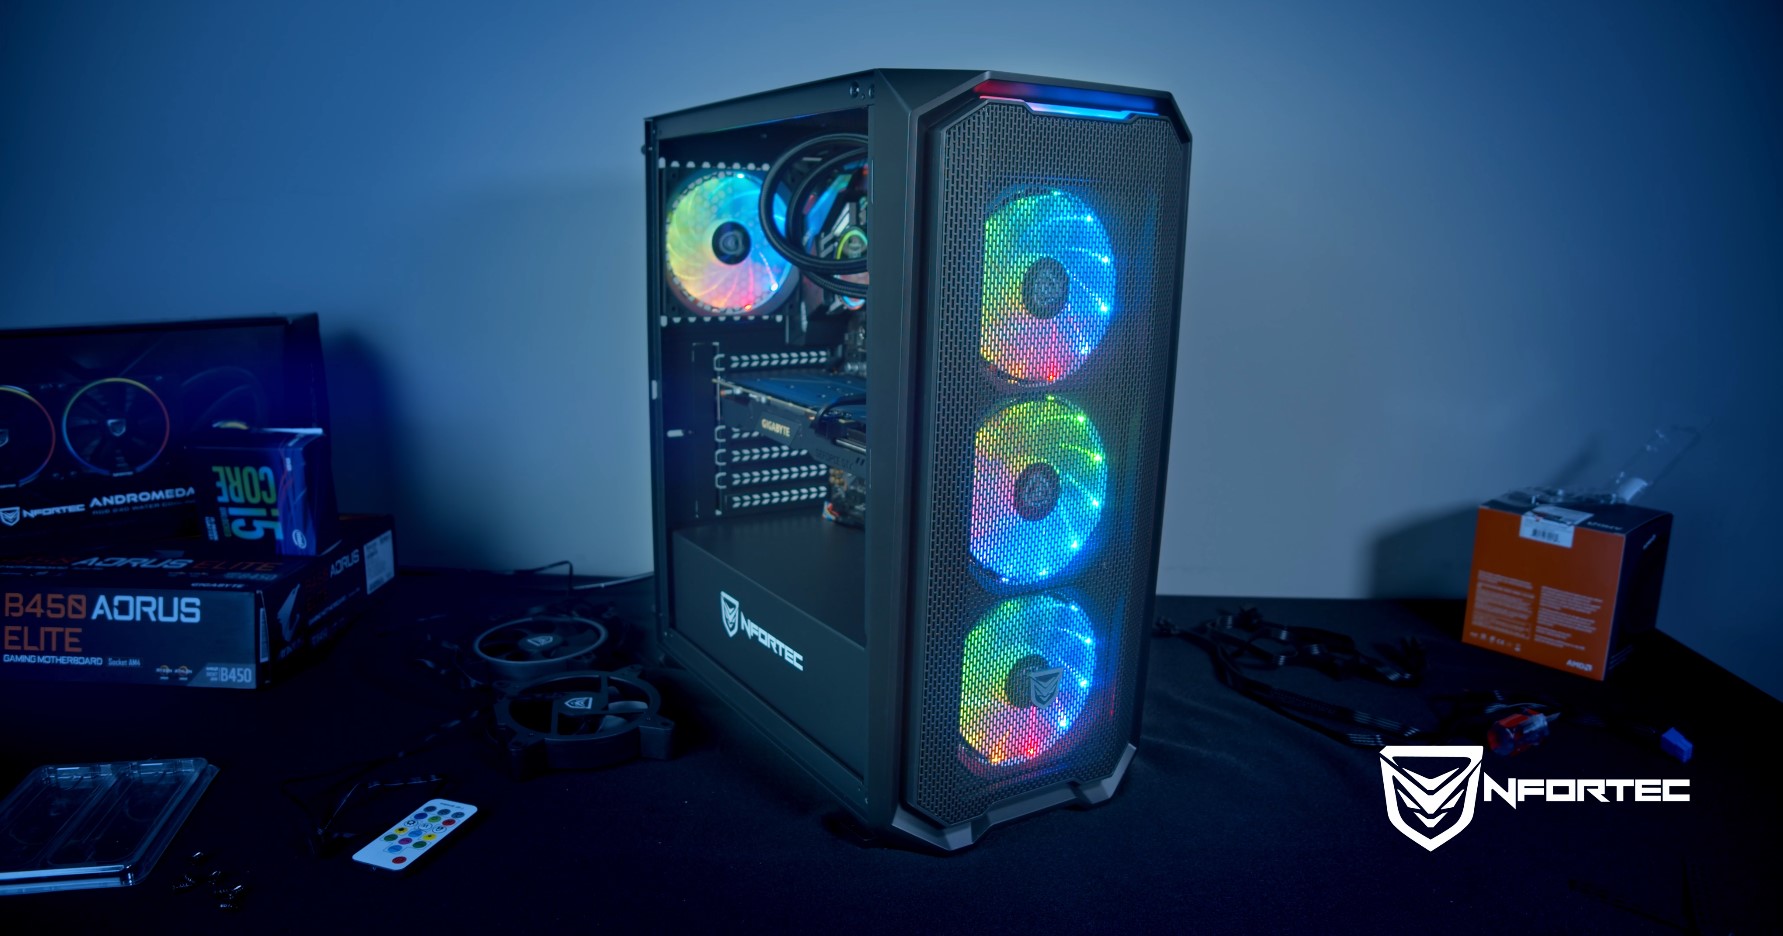
If you have correctly followed all the steps mentioned above, you will already have a gaming pc like the one shown below, led by our magnificent Krater tower in black
Krater ARGB Black Gaming Tower Performance and aesthetics come together in the new chassis Nfortec Krater ARGB, creating a tower that highlights its ventilation system with its mesh front and in turn a spectacular design that catches you from the first moment. *Units purchased from July 2020 carry fans and controller upgraded to 5v 3pin A-RGB connector,...
Save products on your wishlist to buy them later or share with your friends.
Use your Amazon Account
With Amazon Pay and Login with Amazon, you can easily sign-in and use the shipping and payment information stored in your Amazon Account to place an order on this shop.
 English
  Español
 Italian
 Português PT
 Français
 Deutsch
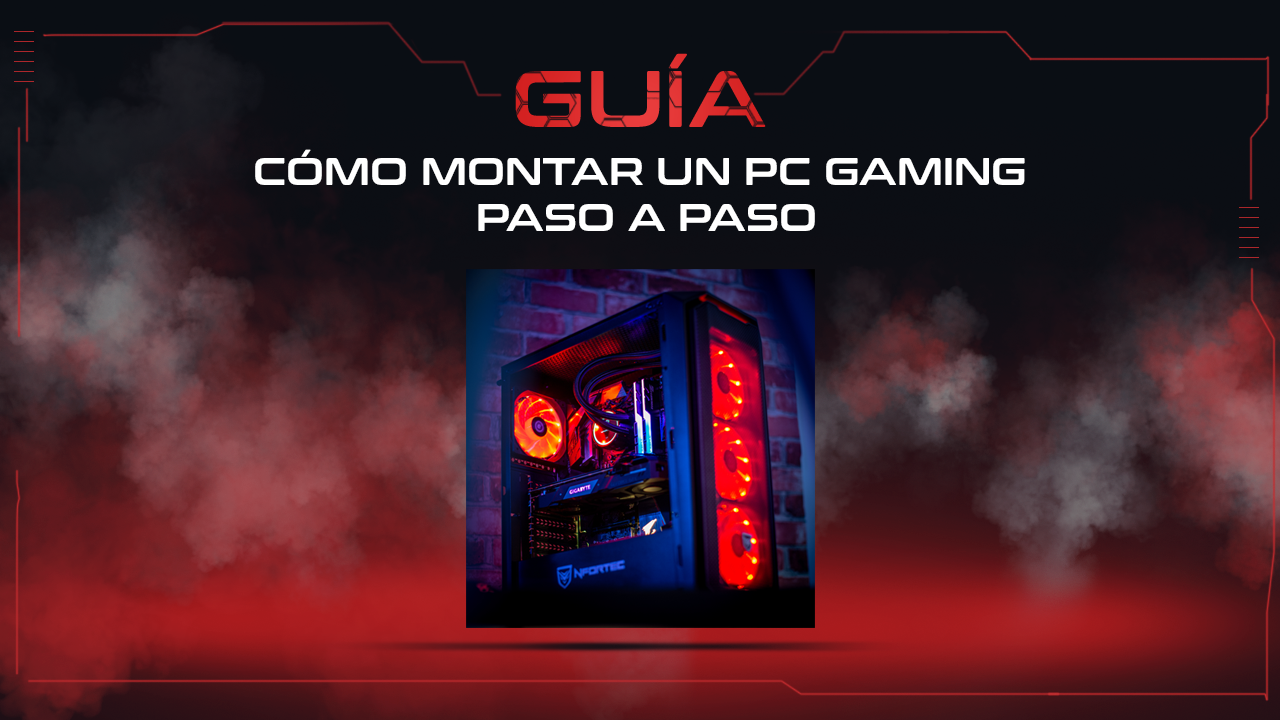


Comments (0)