Our Draco V2 PC tower model is clearly one of your favorites. As we know how fond you (and we) are of it, the last september 2020 adapted it to the new generation, adding a new 5v 3 pin controller ARGB, which replaces the previous model. In essence, they work in a very similar way, but now you can synchronize more components, including from other brands, thanks to the universality of the 3-pin connections
We will start from scratch to explain how to make the connections of the Draco V2 controller, to the components and connectors that the tower comes standard. If your intention is to add more fans or liquid cooling, the procedure is the same, except that the liquid cooling should also be connected to the motherboard, as a general rule, but you should always consult the instructions before making any installation
Remember that this tutorial is to connect the components that Draco V2 comes standard, to its integrated controller, so all connections will be compatible. For your convenience, we recommend removing the side panels of your tower, as it will be easier to access all components and cables
Although in principle the controller will be wired as standard, in the video tutorial we will connect everything from scratch, in case you might need it. We know we don't need to remind you that, any type of connection and installation must be done with the tower disconnected
We recommend that you take a look at the complete tutorial video, before starting with the connections, so that you can identify all the wiring and connections of the controller more easily. As you will see, several wires come out of the Draco V2 controller: one SATA, , one 5v 3 pins and one 12v 4 pins. As for the connections for the components, it has 6 connectors, 3 for lighting and 3 for ventilation. Each fan included as standard will come with two connectors, one for each function. Each 4-pin connection (3 pins + 1 false pin) corresponds to the power supply and the adjacent 3-pin connectors correspond to the ARGB lighting. Having this clear, it will be much easier to understand any connection you want to make to your controller
We will start by making all the fan connections to the controller, connecting the cables in pairs (lighting + ventilation) and always in sequence, that is, one fan after another. In case you want to connect additional fans, liquid cooling or heatsinks, the same process, as long as they are compatible.
After confirming that we have the connections made correctly, we will proceed to connect the 5v 3-pin CPU Fan cable coming out of the controller, to our motherboard. The connection to the motherboard will depend on the model you have, we advise you to always consult the motherboard manual to make sure where to make the connection. In principle, the cable should be connected to SYS_FAN, CHA_FAN or CPU_FAN. After this, we will connect the SATA cable from the controller to our power source
Finally, if what we want is to control the lighting from the button on the front of our tower, enabled for it, we will locate the RESET connector on the front and connect it to the controller as well. If we prefer, we can control the lighting from the software of our motherboard, if it has it
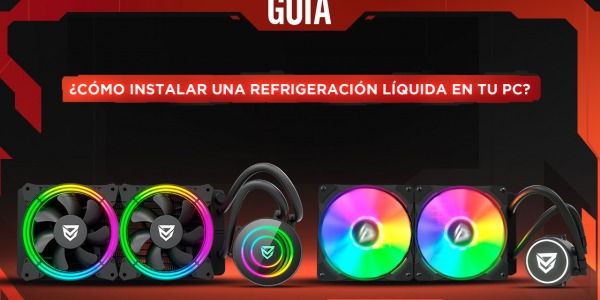
Regarding components compatible with the Draco V2 controller, you have additional fans Velorum and Nebulus and, as far as liquid cooling is concerned, Atria in any of its versions is fully compatible. It is also Hydrus RGB, with its new ARGB technology and 5v 3 pin connections. You can even synchronize our new heatsinks Sculptor and Centaurus X and, as an extra, Maia aRGB connection is also available
A-RGB Board for Gaming Tower Bases The A-RGB board for gaming tower bases is here to stay. Now you can easily and attractively customize the base of your PC with A-RGB lighting. It is compatible with the entire family of Nfortec towers with space in the base and has the 5v 3pin A-RGB connector synchronizable with compatible motherboards.
Save products on your wishlist to buy them later or share with your friends.
Use your Amazon Account
With Amazon Pay and Login with Amazon, you can easily sign-in and use the shipping and payment information stored in your Amazon Account to place an order on this shop.
 English
  Español
 Italian
 Português PT
 Français
 Deutsch


Comments (0)